
Does Stainless Steel Rust? Yes—Here’s What Decides It
Orange spots may be removable iron contamination or localized corrosion. Learn the causes, safe cleaning steps, prevention, and warning signs.
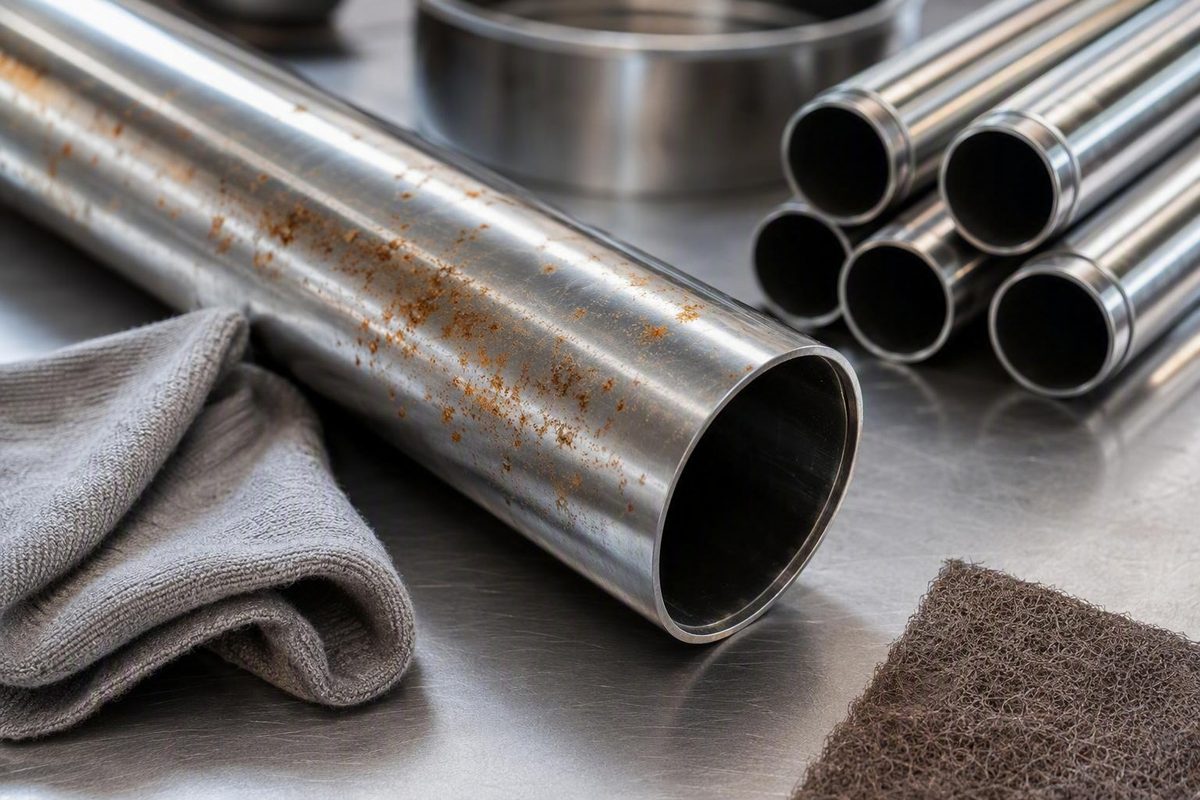
The short answer: stainless steel can rust
Yes, stainless steel can rust or suffer other forms of corrosion. It generally resists corrosion much better than ordinary carbon steel, but stainless means corrosion-resistant—not corrosion-proof, stain-proof, or maintenance-free.
The distinction between rust and corrosion matters. Rust is an iron-oxide corrosion product, typically recognized as reddish-orange or brown residue. Corrosion is the broader deterioration of metal through reactions with its environment. Stainless steel can experience pitting, crevice corrosion, galvanic attack, cracking, or relatively uniform metal loss without developing the flaky red rust associated with carbon steel. These mechanisms have different causes and consequences, even though they are often grouped together as “rust” in everyday conversation (thyssenkrupp Materials’ overview of stainless-steel corrosion).
Nor does every orange mark prove that the stainless alloy itself is corroding. Carbon-steel dust, steel-wool fragments, grinding debris, or residue transferred by tools can settle on stainless steel and rust there. The orange material may then be largely external contamination while the stainless substrate remains intact. Conversely, a small pit can represent genuine localized metal loss even when there is little visible rust.
That is why the right response is not simply to scrub harder. Use this sequence:
- Understand the protection. Stainless steel depends on a thin, chromium-rich passive film.
- Identify the likely cause. Look for salt, chemical residue, trapped moisture, deposits, iron contamination, heat effects, unsuitable fabrication, or the wrong grade for the environment.
- Assess the severity. Determine whether the mark behaves like a removable surface deposit or reveals persistent roughness, cavities, cracking, leakage, or metal loss.
- Respond proportionately. Start with conservative, finish-compatible cleaning, correct the underlying exposure or design problem, and obtain qualified assessment when localized attack or safety is involved.
The practical answer to “does stainless steel rust?” is therefore yes—but visible discoloration can represent anything from a removable speck of foreign iron to consequential localized corrosion.
Why stainless steel normally resists rust
Stainless steel is an iron-based alloy containing chromium. Depending on the grade, it may also contain nickel, molybdenum, manganese, silicon, carbon, and other elements. A commonly used general definition requires at least 10.5% chromium, although that threshold alone does not predict how an alloy will perform in a particular environment (Reliance Foundry’s explanation of stainless-steel passivity).
Chromium is central to corrosion resistance because it reacts readily with oxygen at the surface. This interaction produces an extremely thin, adherent, chromium-rich oxide layer commonly called the passive film. The film acts as a barrier that limits water and oxygen from reaching the iron-rich alloy underneath, reducing the rate of further corrosion.
This passive layer is not comparable to paint, plating, or a plastic sheet applied over the metal. It forms through the interaction of the alloy itself with oxygen in its environment. It is also nearly invisible: an expert explanation published by Scientific American describes the protective film as potentially only a few atomic layers thick and thinner than visible-light wavelengths (how stainless steel’s passive film differs from ordinary rust).
Ordinary carbon steel also forms oxides when exposed to water and oxygen, but its iron-oxide layer is comparatively unstable and poorly protective. That layer can continue growing, cracking, and flaking away, exposing fresh metal and allowing corrosion to proceed. Stainless steel’s chromium-rich film is more stable and tightly attached, so corrosion normally proceeds at a much lower rate while the film remains effective.
This behavior helps explain why a minor scratch does not automatically ruin stainless steel. If light damage exposes a clean surface and sufficient oxygen is available, the passive film can often reform. This recovery is known as repassivation.
However, describing stainless steel as always “self-healing” would be misleading. Repassivation is conditional:
- Chlorides can destabilize the passive film.
- Dirt, scale, or other deposits can isolate the surface.
- Foreign iron can contaminate the damaged area.
- A gasket, lap joint, or deposit can restrict oxygen where the exposed metal needs it.
- Heat tint, scale, and fabrication residue can leave the affected surface less corrosion-resistant than the surrounding metal.
A scratch on clean stainless steel exposed to ordinary air may therefore be uneventful, while a similar scratch beneath salty residue can become a corrosion site. Stainless steel’s resistance results from the interaction among alloy chemistry, surface condition, oxygen, design, and environment—not from permanent immunity contained in the word stainless.
What causes stainless steel to rust or corrode
Corrosion rarely has one universal cause. It usually results from an unfavorable combination of material grade, contaminants, surface condition, geometry, temperature, and exposure time.
| Trigger | Mechanism or effect | Common setting | Prevention priority |
|---|---|---|---|
| Chlorides and salt | Destabilize the passive film and promote localized pitting | Seawater, coastal air, de-icing spray, pool areas, some cleaner residues | Match the grade to the exposure; remove residue; avoid stagnant salt deposits |
| Persistent moisture and deposits | Retain contaminants and create uneven local conditions | Outdoor fixtures, sinks, equipment bases, horizontal ledges | Improve drainage; remove deposits; dry standing water |
| Tight or shielded crevices | Trap solution and restrict oxygen, making repassivation more difficult | Gaskets, lap joints, fasteners, flanges, seams, areas beneath deposits | Reduce unsuitable crevices; make joints drainable, inspectable, and cleanable |
| Free-iron contamination | Deposited carbon-steel particles rust and may disrupt the stainless surface | Shared tools, steel wool, grinding dust, dirty benches, contaminated abrasives | Segregate tools and work areas; use clean, non-iron abrasives |
| Scratches and mechanical damage | Disturb the surface and create sites where residue can collect | Handling damage, scouring, machining, installation | Prevent contamination; clean damaged areas; investigate recurring marks |
| Welding and high heat | Alter surface condition or leave heat tint, scale, and fabrication residue | Weld seams, heat-affected zones, hot-process equipment | Specify suitable fabrication and application-specific post-fabrication treatment |
| Unsuitable chemicals or residues | Attack or interfere with the passive surface under certain conditions | Cleaning, processing, chemical storage, pool maintenance | Follow equipment and alloy guidance; rinse permitted cleaners completely |
| Poor grade–environment match | Provides insufficient resistance for the actual combination of exposures | Coastal, marine, poolside, chemical, or hot service | Select material by service conditions rather than appearance or name |
Chlorides
Chlorides are among the most important practical warning signs. They occur in seawater, coastal aerosols, road de-icing salts, swimming-pool environments, and some cleaning products. They are strongly associated with pitting, a localized mechanism that can create cavities while much of the surrounding surface continues to look intact (Action Stainless on chloride exposure and localized corrosion).
That does not mean any trace of salt causes immediate failure. Risk depends on the stainless grade, chloride concentration, temperature, exposure time, surface finish, deposits, drainage, and whether cleaning removes the residue. The available evidence does not support one universal “safe” chloride concentration, exposure duration, or cleaning interval for all stainless-steel applications.
Warm, stagnant, shielded, or difficult-to-clean locations can therefore behave differently from nearby surfaces exposed to the same general environment.
Water, deposits, and poor drainage
Clean water does not inevitably make stainless steel rust. The concern is prolonged wetness combined with salt, chemicals, dirt, biological material, fabrication residue, or geometry that prevents drainage and cleaning.
A horizontal ledge may repeatedly collect water. Evaporation can leave contaminants behind. Dirt can hold moisture against the metal, while the area beneath a deposit can develop different oxygen conditions from the open surface around it. Improving drainage and removing deposits reduces these risks.
Standing water may also reveal a design problem rather than a cleaning problem. If staining returns in the same low point after every cleaning cycle, the lasting correction may require changing the geometry, shielding the surface from contamination, or selecting a more resistant grade.
Crevices and low oxygen
Tight gaps beneath washers, gaskets, overlapping sheets, deposits, fasteners, and adjoining surfaces can trap liquid while limiting oxygen exchange. The open surface may remain passive, but the shielded area can become less able to maintain or reform its protective film.
This is crevice corrosion. It is localized and strongly influenced by geometry, which is why changing cleaners alone may not solve discoloration that repeatedly appears along the same seam or gasket.
Crevice attack can also remain partly hidden. Inspection and cleaning access should therefore be considered during design rather than treated solely as maintenance concerns.
Free-iron contamination
Stainless steel can acquire ordinary iron from carbon-steel tools, steel wool, grinding debris, wire brushes, storage racks, shared worktables, or contaminated abrasives. Those deposited particles can rust and produce small orange spots on otherwise sound stainless.
The pattern often provides a clue. Scattered specks appearing after nearby construction, grinding, or workshop activity may point toward deposited iron.
Using the wrong tool can create the problem it is intended to remove. A carbon-steel brush may abrade away discoloration temporarily while embedding new rust-prone particles. Even an abrasive intended for stainless work can transfer iron if it was previously used on carbon steel.
Damage, heat, and welding
A scratch does not guarantee lasting corrosion. A clean, oxygen-exposed scratch may repassivate. Risk rises when the damage also traps chloride residue, embeds iron, creates a rough deposit-holding surface, or occurs in a low-oxygen location.
Welding and other high-heat fabrication can change the condition of the surrounding surface. Heat tint, scale, residue, and contamination may reduce local corrosion resistance and may require application-specific post-fabrication cleaning or professional surface treatment. No single treatment is appropriate for every alloy, weld, finish, or service environment; industrial chemical and electrochemical processes also require attention to material compatibility and safety (Unified Alloys’ maintenance and treatment overview).
The governing principle is cumulative. Grade, environment, temperature, exposure duration, finish, geometry, fabrication quality, and maintenance work together. A stainless grade that performs well on a smooth, freely draining surface may perform poorly in a dirty, salt-laden crevice.
Orange stain, tea staining, or serious corrosion? How to assess the signs
Appearance is a useful starting point, but it cannot provide a conclusive at-home metallurgical diagnosis. Assess the mark in stages and avoid assuming that either its color or size reveals the full extent of the problem.
1. Check whether it behaves like a surface deposit
Examine the location and pattern before cleaning:
- Are the marks tiny orange specks near grinding, construction, or workshop activity?
- Was steel wool or a metal scouring pad used?
- Could carbon-steel dust have landed on the surface?
- Does the discoloration appear to sit on an otherwise smooth finish?
- Is it spread randomly, or concentrated at a joint, waterline, weld, or deposit edge?
Use a gentle, manufacturer-compatible cleaning method, then rinse and dry. If the orange material comes away and the surface beneath remains smooth, external iron contamination is plausible. That is not proof that no corrosion occurred, but it differs from finding a persistent cavity beneath the stain.
Document the area after cleaning. A photograph and note of the date can help establish whether the mark returns quickly or remains absent.
2. Consider tea staining
The term describes an appearance, however, not a definitive mechanism. A brown film can also occur alongside pits or crevice corrosion. Clean conservatively, inspect the underlying finish, and pay attention to recurrence rather than relying on the label alone.
3. Look and feel for pitting
Pitting produces discrete cavities or holes and is closely associated with chloride-bearing environments. The important clue is not merely orange color but a depression, pinhole, rough crater, undercut edge, or dark cavity that remains after removable residue is gone.
Avoid aggressive probing or repeated grinding when the component is thin, pressure-containing, hygienic, dimension-critical, or otherwise safety-critical; significant metal loss or exact-dimension requirements may make professional evaluation or replacement preferable to continued cleaning (Unified Alloys on structural damage, dimensional loss, and specialist assessment).
4. Inspect joints and shielded areas for crevice attack
Recurring discoloration beside a gasket, fastener, seam, flange, lap joint, deposit edge, or contact point deserves closer attention. Crevice corrosion occurs in shielded gaps where drainage and oxygen access are limited.
The visible mark may originate from damage hidden inside the joint. If the assembly can be inspected without compromising seals, hygiene, pressure integrity, or safe operation, examine accessible mating areas. Otherwise, have the equipment assessed by someone qualified to disassemble and evaluate it.
Cleaning the exposed edge without correcting trapped moisture or residue inside the crevice is unlikely to provide a lasting solution.
5. Distinguish other corrosion patterns
General corrosion appears as relatively uniform surface loss. Stainless steel is valued partly because broad attack is limited in suitable environments, but severe or incompatible exposure can still produce more widespread deterioration.
Other mechanisms may not resemble ordinary rust:
- Galvanic corrosion can occur in a multi-metal assembly under suitable electrical and environmental conditions.
- Cracking may appear as fine lines rather than orange residue.
- Heat-affected attack may follow welds or thermally altered areas.
- Contamination staining may remain superficial even though it looks dramatic.
These possibilities are why color alone should not be treated as a diagnosis.
Observation checklist
After conservative cleaning, thorough rinsing, and drying, check for:
- a smooth surface versus persistent roughness;
- isolated cavities, pinholes, or undercut edges;
- marks concentrated at joints, gaskets, welds, deposits, or waterlines;
- rapid recurrence after cleaning;
- cracks, bulging, distortion, or perforation;
- leakage or loss of pressure;
- changed wall thickness, dimensions, fit, or function;
- surfaces that can no longer be cleaned to the required standard.
Cleaning away discoloration does not prove that the underlying metal remains sound. Deep pits, cracks, perforation, leakage, fast recurrence, or measurable and functional metal loss warrant qualified assessment, particularly on structural, load-bearing, pressure-containing, hygienic, food-contact, or otherwise safety-critical equipment.
Does the grade matter? 304 versus 316 stainless steel
Yes. Grades 304 and 316 are common austenitic stainless steels that can look essentially identical. Their chemistry and chloride resistance differ, however, so visual similarity does not make them interchangeable.
| Factor | 304 stainless steel | 316 stainless steel |
|---|---|---|
| Typical composition | 18.0–20.0% chromium and 8.0–10.5% nickel; no intentional molybdenum addition in the basic grade | 16.0–18.0% chromium, 10.0–14.0% nickel, and 2.0–3.0% molybdenum |
| Relative chloride resistance | Good general resistance, but more vulnerable to chloride-related pitting | Generally better resistance to chloride-related pitting and crevice corrosion |
| Broad environment fit | Mild to moderately aggressive service when design and maintenance are appropriate | Stronger candidate where coastal salt, marine exposure, de-icing salt, or certain chemicals increase demand |
| Main limitation | Chloride exposure can exceed its localized-corrosion resistance | Better than 304 in many chloride exposures, but not immune |
Typical composition ranges are based on Rolled Alloys’ 304-versus-316 comparison; specifications permit ranges, and actual compositions vary within each grade.
Molybdenum is the important practical distinction. Its presence generally gives 316 better resistance than 304 to chloride-related pitting and crevice corrosion. That makes 316 a stronger candidate where coastal salt, marine exposure, de-icing residue, or more aggressive chemicals are expected.
But 316 is not rust-proof. Poor drainage, shielded crevices, rough deposits, iron contamination, unsuitable fabrication, and deficient maintenance can undermine either grade.
Highly aggressive environments may exceed the resistance of both 304 and 316. Depending on the service, a duplex stainless steel, higher-molybdenum alloy, nickel-based alloy, or another material may be needed. That choice should be based on complete service conditions rather than a casual upgrade from one familiar grade to another.
Nor is 304 simply “indoor” and 316 simply “outdoor.” A well-maintained 304 component may perform acceptably in one outdoor location, while 304 used indoors can pit if it is repeatedly exposed to chloride-bearing chemicals. Choosing 316 cannot compensate for a design that permanently traps contaminated water behind a gasket.
Grade selection is one part of a system that also includes chemistry, temperature, duration, surface finish, fabrication, geometry, cleaning access, and the consequences of failure. For an application-specific example of how service conditions influence grade choice, see the discussion of stainless-steel chimney liners.
How to prevent stainless-steel rust from design through maintenance
Reliable prevention combines five controls: suitable grade, corrosion-aware design, clean fabrication, appropriate surface care, and regular inspection.
1. Select for the real exposure
Do not specify material based only on the label “stainless.” Identify the expected combination of:
- chlorides from sea spray, road salt, pool environments, or processing;
- cleaning and process chemicals;
- continuous, intermittent, or condensing moisture;
- operating and cleaning temperatures;
- deposits and expected cleaning access;
- surface-finish requirements;
- required service life and consequences of failure.
Where uncertainty is consequential, involve a corrosion specialist, engineer, fabricator, or alloy supplier and provide complete service details. Selecting 316 instead of 304 can reduce chloride-related risk, but severe environments may require moving beyond both.
2. Design out trapped water and deposits
Good geometry helps the passive film remain effective. Favor surfaces and assemblies that:
- drain rather than retain standing water;
- allow airflow and drying;
- avoid unnecessary horizontal ledges and cavities;
- minimize tight, unsealed crevices;
- keep joints accessible for inspection and cleaning;
- prevent carbon-steel dust, rust, or runoff from being deposited on stainless surfaces;
- allow salt and process residue to be rinsed away.
Design details can matter as much as nominal grade. A freely draining 304 surface and a permanently wet 316 crevice are not equivalent conditions.
3. Keep fabrication clean
Separate stainless-steel work from carbon-steel contamination wherever practical. Do not use carbon-steel wool, ordinary steel wire brushes, or contaminated abrasives on stainless. Keep grinding dust and sparks from nearby carbon-steel operations away from stainless surfaces.
Worktables, clamps, handling equipment, storage racks, and transport contacts can also transfer iron. Dedicated tools help only if they remain clean; an abrasive previously used on carbon steel can contaminate stainless even if it was originally suitable for stainless work.
After welding, heating, cutting, or heavy fabrication, inspect for heat tint, scale, embedded iron, and residue. Depending on the alloy, finish, fabrication history, and application, professional post-fabrication cleaning, passivation, pickling, weld cleaning, or refinishing may be required. These are controlled processes, not universal household remedies.
4. Start routine care gently
For many intact surfaces, a low-risk starting method is:
- Remove loose dirt with warm water.
- Wash with mild detergent and a clean, soft cloth or approved nonmetallic pad.
- Rinse completely so loosened contaminants and detergent do not remain.
- Dry the surface, paying particular attention to joints and horizontal areas.
Remove salt, dirt, chemical splashes, and standing water rather than allowing repeated wet-and-dry cycles to build concentrated deposits. The correct maintenance interval depends on the grade and exposure; there is no defensible universal schedule for every stainless item.
A clean scratch exposed to oxygen may repassivate. If orange staining repeatedly returns at that scratch, however, the recurrence suggests that iron contamination, chlorides, retained deposits, or the wider environment remains unresolved.
5. Inspect patterns, not just appearance
Inspection should ask why a mark appears where it does. A recurring line beside a gasket suggests a different problem from scattered specks after nearby grinding.
Record:
- the location and pattern;
- recent fabrication or construction activity;
- cleaning products and methods used;
- salt, chemical, or heat exposure;
- how quickly the mark returns;
- changes in roughness, dimensions, leakage, or function.
Patterns make root causes easier to identify and reduce the temptation to treat every orange mark with progressively harsher abrasion.
Coatings can help in selected applications, but they are not universal cures. A coating must be compatible with the stainless surface, preparation method, operating temperature, chemicals, cleaning process, appearance requirements, and any hygienic obligations. Treat coating as an engineered system, not a substitute for suitable alloy selection, clean fabrication, and drainage.
How to clean light rust without making the problem worse
Cleaning should follow an escalation ladder. Begin with the least aggressive method, inspect after every stage, and stop when the finish, application, or corrosion severity calls for specialist help.
Step 1: Read the manufacturer’s instructions
Before applying any cleaner, review the care instructions for the specific appliance, cookware, architectural panel, coated surface, brushed finish, sink, tank, or process equipment.
“Stainless steel” describes a large alloy family rather than one universal surface. Decorative films, fingerprint-resistant coatings, polished faces, brushed grains, weld finishes, and food-contact requirements can change what is acceptable. Product-specific instructions should take priority over generic household advice.
If the instructions do not address the mark, contact the manufacturer or fabricator before using acids, strong specialty products, powered abrasives, or industrial treatments.
Step 2: Use warm water and mild detergent
For light orange spotting or an uncertain surface mark:
- Lift away loose particles without dragging them across the finish.
- Apply warm water and mild detergent with a clean, soft cloth or approved nonmetallic pad.
- Use light pressure.
- Rinse thoroughly with clean water.
- Dry with a clean cloth.
Once the area is dry, inspect it under good light. If the stain is gone and the surface remains smooth, monitor the area rather than immediately escalating to a stronger process.
Step 3: Use only a compatible specialty product
If gentle washing leaves a stain, use only a specialty cleaner approved for the particular item, finish, and application. Follow the label requirements for contact time, ventilation, personal protective equipment, rinsing, and disposal.
Do not assume that a familiar kitchen mixture is universally safe because it is described as “natural.” Recommendations involving vinegar, baking soda, citrus, salt, or other household ingredients vary widely, and the available evidence does not establish them as safe and effective for every stainless grade, coating, or finish.
Likewise, broad claims that a named chemical is always safe—or always unsafe—are unreliable without considering concentration, temperature, contact time, surface finish, and application. The sound rule is to verify compatibility first, use the least aggressive effective process, rinse completely, and inspect afterward.
Step 4: Avoid iron-bearing and finish-damaging tools
Do not use:
- carbon-steel wool;
- ordinary metal scouring pads;
- carbon-steel wire brushes;
- abrasives previously used on carbon steel;
- shared grinding or polishing tools that may contain iron debris.
These tools can embed rust-prone particles. Aggressive abrasion can also flatten a brushed grain, haze a polished face, remove a coating, change dimensions, or leave a visibly mismatched repair.
Even a tool sold for stainless-steel work must be clean and appropriate for the finish. A fabricator restoring an unfinished industrial component has different options from a homeowner cleaning a coated appliance panel.
Step 5: Escalate industrial treatments to qualified personnel
Acids, commercial passivation products, pickling, electrochemical cleaning, electrolysis, blasting, grinding, and refinishing carry application-specific safety and compatibility risks.
Professional restoration may be appropriate after welding, heavy fabrication, widespread contamination, or recurring corrosion. The correct process depends on the alloy, finish, contamination, fabrication history, application, and required final condition. Guidance on stainless-steel maintenance specifically recommends consulting appropriate professionals and safety information before advanced chemical or electrochemical treatment.
For pressure-containing, structural, architectural, hygienic, food-contact, pharmaceutical, or dimension-critical components, involve the manufacturer, fabricator, engineer, or qualified finishing specialist rather than improvising.
Step 6: Check what cleaning accomplished
Cleaning can remove:
- foreign iron particles;
- orange corrosion products;
- salt and chemical residue;
- dirt that retains moisture;
- some superficial discoloration.
It cannot replace metal lost to a pit, rebuild a thinned wall, close a crack, repair a perforation, or automatically restore a ground surface to its original dimensions and finish.
After cleaning and complete drying, document and monitor the area.
If the stain keeps returning, stop treating the color as the primary problem and investigate the cause.
When cleaning is not enough
A removable orange stain and a deep localized cavity require different decisions. Cosmetic cleanup is reasonable only when the surface remains intact and the item’s function, dimensions, cleanliness, and safety are unaffected.
Escalate the problem when you find:
- deep or numerous pits;
- rough cavities that remain after residue is removed;
- cracks or crack-like lines;
- perforation or leakage;
- distortion or loss of fit;
- measurable wall thinning or changed dimensions;
- corrosion that returns quickly after correct cleaning;
- attack extending into seams, gasketed joints, welds, or inaccessible gaps;
- a surface that can no longer be cleaned to its required standard.
Qualified assessment is particularly important for structural members, pressure-containing equipment, load-bearing tubing, lifting or support hardware, hygienic processing equipment, and food-contact components.
Professional evaluation may consider the actual grade, surface finish, exposure chemistry, temperature, design, weld and fabrication history, remaining thickness, crack indications, and whether the initiating cause can be removed. Grade verification may also be relevant because 304 and 316 cannot reliably be distinguished by appearance alone.
Repair is not automatically the best answer. Replacement may be preferable when corrosion has compromised dimensions, pressure retention, load capacity, function, appearance requirements, or cleanability. Surface cleaning or passivation may improve the condition of suitable components, but neither process rebuilds missing metal.
The lasting correction is broader than polishing away the orange mark. Remove chloride residue, eliminate carbon-steel contamination, improve drainage, redesign a problematic crevice, correct the fabrication condition, or select a more suitable alloy. Stainless steel earns its name from a protective passive film—not immunity. When pitting or safety is involved, conservative cleaning and qualified assessment are more reliable than cosmetic reassurance.
Frequently asked questions
Can 304 stainless steel rust?
Yes. Grade 304 provides good corrosion resistance in many mild and moderately aggressive environments, but it is not rust-proof. Chlorides, iron contamination, retained deposits, poor drainage, unsuitable chemicals, heat-affected surfaces, and oxygen-poor crevices can compromise its passive film.
Do not treat 304 as automatically safe merely because an installation is indoors. Indoor pool areas, chloride-bearing cleaning processes, salt storage, and chemical exposure can be aggressive. Conversely, maintained 304 may perform acceptably in some outdoor settings. Judge the actual service conditions rather than the building boundary.
Can 316 stainless steel rust in saltwater or coastal environments?
Yes. The molybdenum in 316 generally gives it better resistance than 304 to chloride-related pitting and crevice corrosion, often making it a stronger candidate for coastal, salty, or marine exposure. It is still not immune.
Salt concentration during drying, warm conditions, persistent deposits, stagnant crevices, poor surface condition, contamination, and long exposure can overwhelm 316. Severe service may require a more resistant alloy selected with expert input.
Will a scratch permanently destroy stainless steel’s protection?
Not necessarily. A clean stainless surface exposed to sufficient oxygen can often reform its passive film after light damage.
A scratch becomes more concerning when it contains embedded iron, retains salty residue, lies beneath a deposit, or sits in a tight low-oxygen gap. If discoloration repeatedly returns at the scratch, the environment or contamination source is still interfering with protection.
Why does stainless steel develop small orange spots?
Common possibilities include rusting carbon-steel particles transferred by tools, steel wool, grinding dust, work surfaces, storage contacts, or contaminated abrasives. Salt deposits and early localized corrosion can also produce orange or brown marks.
Begin with gentle, compatible cleaning and inspect the surface after drying. If it remains smooth and the spots do not return, superficial contamination is plausible. Recurring spots, roughness, cavities, or marks concentrated at crevices warrant closer assessment.
Can rust be completely removed from stainless steel?
Surface staining, foreign iron, and corrosion products can often be removed, depending on the finish and severity. That does not mean corrosion damage has been reversed.
No cleaning method can replace metal already lost through pitting, thinning, cracking, or perforation. If cavities remain, staining returns quickly, dimensions have changed, or the component is safety-critical, obtain qualified evaluation rather than continuing to abrade the surface.